Showing posts with label Deployment. Show all posts

24 May 2016

visual studio web deployment / deploying extra files

Deploying extra files with Web Deploy 

http://www.asp.net/mvc/overview/deployment/visual-studio-web-deployment/deploying-extra-files

The official search result shows a somewhat complex approach to including files to the project deployment, a more simpler approach is to fake that the files have been included as content. This approach requires the files to be accessible at the root prior to deploying.

By creating a *.wpp.targets (named the same as your project) you can add to the project files source prior to building. If you had included your content from Visual Studio to the project, it would have resulted in the external content being saved as <ItemGroup> and Content Include xxx for each file. By doing this manually you can use search patterns to add unknown amounts of files using \**\*.
ProjectName.wpp.targets
<?xml version="1.0" encoding="utf-8"?>
<Project ToolsVersion="4.0" xmlns="http://schemas.microsoft.com/developer/msbuild/2003">
 <ItemGroup>
  <Content Include="css\**\*" />
  <Content Include="content\**\*" />
 </ItemGroup>
</Project>

It is that simple to include external content.

Another classic issue using webdeployment is to control the content of your web.config, AutoParameterizationWebConfigConnectionStrings is the solution for this. http://blog.jan.hebnes.dk/2015/07/umbraco-to-azure-msdeploy-error.html

17 December 2015

Turn on Compile-time View Checking for ASP.NET MVC

The .cshtml files are not natively compiled and therefore cheched for spelling mistakes at compile time. This can be changed, e.g. at build server level.

<target condition="'$(MvcBuildViews)'=='true'" name="AfterBuild">
<aspnetcompiler physicalpath="$(ProjectDir)\..\$(ProjectName)" virtualpath="temp"></aspnetcompiler>
</target>

<propertygroup>
<mvcbuildviews>true</mvcbuildviews>
</propertygroup>

This has been an option since 2010, not many know about it.
http://blogs.msdn.com/b/jimlamb/archive/2010/04/20/turn-on-compile-time-view-checking-for-asp-net-mvc-projects-in-tfs-build-2010.aspx

03 July 2015

Umbraco to Azure / Transformed Web.config MSDeploy error

Could not open Source file: Could not find a part of the path

A rather simple umbraco nuget based install and base Publishing profile from Azure getting me these types of errors:

Transformed Web.config using D:\Solutions\xxx\src\xxx.Web\Web.Release.config into obj\Release\TransformWebConfig\transformed\Web.config.
C:\Program Files (x86)\MSBuild\Microsoft\VisualStudio\v12.0\Web\Microsoft.Web.Publishing.targets(2294,5): Error : Could not open Source file: Could not find a part of the path 'D:\Solutions\xxx\src\xxx.Web\umbraco\Install\Views\Web.config;\umbraco\Install\Views\Web.config'.

Others having the same issue.
http://forums.iis.net/t/1217423.aspx?MSDeploy+error+Could+not+open+Source+file+Could+not+find+a+part+of+the+path+

Issue

Our default projects have a .wpp.Targets file that handles packages for msdeploy on our central build server, the package template for umbraco contains all files related to umbraco leaving "no one behind" strategy. 

wpp.Targets defines default packages information that is set throughout any publishing profiles.

Combined with the default publishing profile where a connection string wants to replace content in web.config this gives issues on web.config files other places than the root of the site. 

Our wpp.Targets contains a simple content inclusion, that makes sure the msdeploy package contains all required umbraco files even tho they are not part of the VS Project.

<ItemGroup>
  <!-- Umbraco -->
  <Content Include="css\**\*" />
  <Content Include="content\**\*" />
  <Content Include="macroscripts\**\*" />
  <Content Include="masterpages\**\*" />
  <Content Include="properties\**\*" />
  <Content Include="umbraco\**\*" />
  <Content Include="umbraco_client\**\*" />
    
  <Content Include="App_Browsers\**\*" />
  <Content Include="App_Plugins\**\*" />
  <Content Include="App_Start\**\*" />
 </ItemGroup>

http://www.asp.net/mvc/overview/deployment/visual-studio-web-deployment/deploying-to-production
A .pubxml file contains the settings that pertain to a specific publish profile. If you want to configure settings that apply to all profiles, you can create a .wpp.targets file. The build process imports these files into the .csproj or .vbproj project file, so most settings that you can configure in the project file can be configured in these files. For more information about .pubxml files and .wpp.targets files, seeHow to: Edit Deployment Settings in Publish Profile (.pubxml) Files and the .wpp.targets File in Visual Studio Web Projects.

Solution: AutoParameterizationWebConfigConnectionStrings

Several places online the proposed solution was AutoParameterizationWebConfigConnectionStrings=false as a parameter on msbuild but using VS Publishinging it was not clear how to introduce this parameter.

It turns out that you just through it in the "PropertyGroup" of the publishing profile. 
<AutoParameterizationWebConfigConnectionStrings>False</AutoParameterizationWebConfigConnectionStrings>

This is ninja kungfu knowledge that is apparently only learned after several hours of fidling about... any msbuild property can be set on the "PropertyGroup" of a profile.. enjoy.

The only change left is that the release profile must replace the connection string to the production connection string is otherwise would be set on the publishing replace event.

Double bonus solution

The PropertyGroup> <AutoParameterizationWebConfigConnectionStrings can be set in the Wpp.Targets file and thereby allowing for a "default" wpp.Targets that can handle imported profiles from Azure without requiring changes in the imported profile pubxml.

Our wpp.Targets on all Umbraco projects is now:


<Project ToolsVersion="4.0" xmlns="http://schemas.microsoft.com/developer/msbuild/2003">
 <ItemGroup>
  <!-- Umbraco -->
  <Content Include="css\**\*" />
  <Content Include="content\**\*" />
  <Content Include="macroscripts\**\*" />
  <Content Include="masterpages\**\*" />
  <Content Include="properties\**\*" />
  <Content Include="umbraco\**\*" />
  <Content Include="umbraco_client\**\*" />
    
  <Content Include="App_Browsers\**\*" />
  <Content Include="App_Plugins\**\*" />
  <Content Include="App_Start\**\*" />

 </ItemGroup>
 <PropertyGroup>
  <AutoParameterizationWebConfigConnectionStrings>False</AutoParameterizationWebConfigConnectionStrings>
  <AfterAddIisSettingAndFileContentsToSourceManifest Condition="'$(AfterAddIisSettingAndFileContentsToSourceManifest)'==''">
     $(AfterAddIisSettingAndFileContentsToSourceManifest);
     MakeEmptyFolders;
  </AfterAddIisSettingAndFileContentsToSourceManifest>
 </PropertyGroup>
 <Target Name="MakeEmptyFolders">
  <Message Text="Adding empty folders" />
  <MakeDir Directories="$(_MSDeployDirPath_FullPath)\App_Data" />
  <MakeDir Directories="$(_MSDeployDirPath_FullPath)\App_Code" />
  <MakeDir Directories="$(_MSDeployDirPath_FullPath)\css" />
  <MakeDir Directories="$(_MSDeployDirPath_FullPath)\imagecache" />
  <MakeDir Directories="$(_MSDeployDirPath_FullPath)\macroscripts" />
  <MakeDir Directories="$(_MSDeployDirPath_FullPath)\masterpages" />
  <MakeDir Directories="$(_MSDeployDirPath_FullPath)\media" />
  <MakeDir Directories="$(_MSDeployDirPath_FullPath)\usercontrols" />
  <MakeDir Directories="$(_MSDeployDirPath_FullPath)\views\partials" />
  <MakeDir Directories="$(_MSDeployDirPath_FullPath)\views\macropartials" />
 </Target>
</Project>

node install bypass Visual Studio 2010 build tools

node install error "please install Visual Studio 2010 build tools" 

Running node install on a recent project that i had not build before got me the error message pasted below, related to msbuild 2010 in a node context.
At first i believed there was an error in path because of build.js in "Failed at the node-sass@1.0.3 install script 'node build.js'" and maybe the path to msbuild got cought up.
But after an extensive search i finally came upon this nice little comment:


https://github.com/TooTallNate/node-gyp/issues/154#issuecomment-30200420
I installed VS2012, and now have to include --msvs_version=2012 in any npm install calls that will include native modules. (seanmonstar)

Reading the full error message one could find this statement:
The build tools for Visual Studio 2010 (Platform Toolset = 'v100') cannot be found. To build using the v100 build tools, please install Visual Studio 2010 build tools.

The Solution: npm install --msvs_version=2013


Full error message

> node-sass@1.0.3 install D:\Solutions\xxx\node_modules\grunt-sass\node_modules\node-sass
> node build.js

child_process: customFds option is deprecated, use stdio instead.

D:\Solutions\xxx\node_modules\grunt-sass\node_modules\node-sass>if not defined npm_config_node_gyp (node "C:\Program Files\nodejs\node_modu
les\npm\bin\node-gyp-bin\\..\..\node_modules\node-gyp\bin\node-gyp.js" rebuild )  else (rebuild)
Building the projects in this solution one at a time. To enable parallel build, please add the "/m" switch.
C:\Program Files (x86)\MSBuild\Microsoft.Cpp\v4.0\V120\Microsoft.Cpp.Platform.targets(64,5): error MSB8020: The build tools for Visual Studio 2010 (Platform To
olset = 'v100') cannot be found. To build using the v100 build tools, please install Visual Studio 2010 build tools.  Alternatively, you may upgrade to the cur
rent Visual Studio tools by selecting the Project menu or right-click the solution, and then selecting "Upgrade Solution...". [D:\Solutions\xxx\node_modules\grunt-sass\node_modules\node-sass\build\binding.vcxproj]
gyp ERR! build error
gyp ERR! stack Error: `C:\Program Files (x86)\MSBuild\12.0\bin\msbuild.exe` failed with exit code: 1
gyp ERR! stack     at ChildProcess.onExit (C:\Program Files\nodejs\node_modules\npm\node_modules\node-gyp\lib\build.js:269:23)
gyp ERR! stack     at ChildProcess.emit (events.js:110:17)
gyp ERR! stack     at Process.ChildProcess._handle.onexit (child_process.js:1074:12)
gyp ERR! System Windows_NT 6.3.9600
gyp ERR! command "node" "C:\\Program Files\\nodejs\\node_modules\\npm\\node_modules\\node-gyp\\bin\\node-gyp.js" "rebuild"
gyp ERR! cwd D:\Solutions\xxx\node_modules\grunt-sass\node_modules\node-sass
gyp ERR! node -v v0.12.4
gyp ERR! node-gyp -v v1.0.3
gyp ERR! not ok
Build failed
npm ERR! Windows_NT 6.3.9600
npm ERR! argv "C:\\Program Files\\nodejs\\\\node.exe" "C:\\Program Files\\nodejs\\node_modules\\npm\\bin\\npm-cli.js" "install"
npm ERR! node v0.12.4
npm ERR! npm  v2.10.1
npm ERR! code ELIFECYCLE

npm ERR! node-sass@1.0.3 install: `node build.js`
npm ERR! Exit status 1
npm ERR!
npm ERR! Failed at the node-sass@1.0.3 install script 'node build.js'.
npm ERR! This is most likely a problem with the node-sass package,
npm ERR! not with npm itself.
npm ERR! Tell the author that this fails on your system:
npm ERR!     node build.js
npm ERR! You can get their info via:
npm ERR!     npm owner ls node-sass
npm ERR! There is likely additional logging output above.

npm ERR! Please include the following file with any support request:
npm ERR!     D:\Solutions\xxx\npm-debug.log

The Solution: npm install --msvs_version=2013

 D:\Solutions\xxx\xxx>npm install --msvs_version=2013
npm WARN package.json xxx@0.0.1 No repository field.
npm WARN package.json xxx@0.0.1 No README data
npm WARN package.json xxx@0.0.1 No license field.
/
> node-sass@1.0.3 install D:\Solutions\xxx\node_modules\grunt-sass\node_modules\node-sass
> node build.js

child_process: customFds option is deprecated, use stdio instead.

D:\Solutions\xxx\node_modules\grunt-sass\node_modules\node-sass>if not defined npm_config_node_gyp (node "C:\Program Files\nodejs\node_modu
les\npm\bin\node-gyp-bin\\..\..\node_modules\node-gyp\bin\node-gyp.js" rebuild )  else (rebuild)
Building the projects in this solution one at a time. To enable parallel build, please add the "/m" switch.
cl : Command line warning D9025: overriding '/GR-' with '/GR' [D:\Solutions\xxx\node_modules\grunt-sass\node_modules\node-sass\build\bindi
ng.vcxproj]
......

[And it went on - Happy `til the end]

20 October 2012

Handling PowerShell Scripts Failure Conditions in TeamCity

PowerShell scripts in TeamCity build steps can be a pain to handle when they fail and you want them to brake the build process.

Part of our OneClick-deployment-for-Sitecore is a build step for production where we run a backup script for the production Sql servers prior to releasing the Sitecore Items with TDS. Some time ago we were hit with the following issue that showed up in the buildlog but did not have any effect on the build process.

This meant that we did not have the backup in place prior to deploying the Sitecore Items!

[10:43:37]Step 3/7: Backup DB (Powershell) (32s)
[10:43:37][Step 3/7] Starting: C:\Windows\system32\cmd.exe /c C:\Windows\SysWOW64\WindowsPowerShell\v1.0\powershell.exe -NonInteractive -File D:\TeamCity\buildAgent\work\54acd6c7ad57d4b9\BackupScript.ps1 xx prod xx prod 0.0.148.1937 && exit /b %ERRORLEVEL%
[10:43:37][Step 3/7] in directory: D:\TeamCity\buildAgent\work\54acd6c7ad57d4b9
[10:44:09][Step 3/7] Exception calling "SqlBackup" with "1" argument(s): "Backup failed for Server '
[10:44:09][Step 3/7] xxxx'. "
[10:44:09][Step 3/7] At D:\TeamCity\buildAgent\work\54acd6c7ad57d4b9\BackupScript.ps1:35 char:22
[10:44:09][Step 3/7] +     $smoBackup.SqlBackup <<<< ($server)
[10:44:09][Step 3/7]     + CategoryInfo          : NotSpecified: (:) [], MethodInvocationException
[10:44:09][Step 3/7]     + FullyQualifiedErrorId : DotNetMethodException
[10:44:09][Step 3/7]  
[10:44:09][Step 3/7] Exception calling "SqlBackup" with "1" argument(s): "Backup failed for Server '
[10:44:09][Step 3/7] xxx'. "
[10:44:09][Step 3/7] At D:\TeamCity\buildAgent\work\54acd6c7ad57d4b9\BackupScript.ps1:35 char:22
[10:44:09][Step 3/7] +     $smoBackup.SqlBackup <<<< ($server)
[10:44:09][Step 3/7]     + CategoryInfo          : NotSpecified: (:) [], MethodInvocationException
[10:44:09][Step 3/7]     + FullyQualifiedErrorId : DotNetMethodException
[10:44:09][Step 3/7]  
[10:44:10][Step 3/7] Process exited with code 0

The problem was caused by missing disk space on the Sql server (due to many releases and backups) so we were lucky to have a disk space monitor alert from the hosting provider.

Updating the build for handling these PowerShell Exceptions can be done by either updating the return codes for the shell script but can also be achieved with TeamCity's "Build Failure Conditions" with a text validation on the build log.

Monitoring Sitecore TDS Exclude Rules with MSBuild Task


MSBuild Task for monitoring the Exclude Rules in a Sitecore TDS Project file.

We use TDS Deployment straight to production and UAT, therefore we require build safety for validating that no content from the Content and Media Nodes is released to these environments.

Further details on our release model: OneClick-deployment-for-Sitecore


The custom task is added to any of your projects project files with the UsingTask. This could be the TDS Project file but it can also be your main web project file.

The parameters are the Sitecore Paths to monitor and the Exclude Rules to monitor for. By setting up a separate target you might also just want to trigger the validation for the builds on the target environments.

Errors will take down the build and make sure your team maintains the integrity of the environment.


The same "hard" validation should be set on server side, so that TDS can be configured to block the attempt of updating certain paths on a UAT or test environment. But currently TDS does not support this without considerable ninja moves. The suggestion has been sent to Hedgehog.

Source Code available on https://gist.github.com/3922384

12 November 2010

Sitecore in a Continuous Integration setup

removing manual operations related to Sitecore releases.

For the last year we have been focusing on integrating our Sitecore solutions in a Continuous Integration environment. We now have two larger Sitecore solutions and many smaller ones in the environment, where we can build, test and deploy environments, including Sitecore Items. We have gone through some iterations of the environment and find that we are ready to share some of our experiences.


Continuous Integration

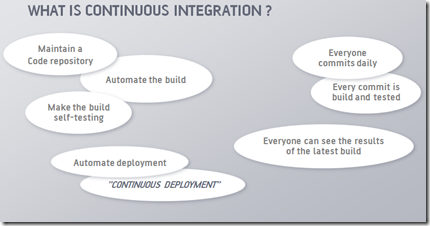
The main purpose of continuous integration is to have an environment where code is build and tested at every commit, secondarily the build can be pushed to TEST or QA environments. The ultimate goal, for us, is to be able to test, validate and push Sitecore Sites from development to production, without any manual steps.

image

Continuous Integration and Sitecore

A Sitecore solution is composed of three parts, 1) the code 2) the database build by the developers (templates, layouts etc) and 3) the user content that is stored under sitecore/content and sitecore/media. The code is easy to integrate in a automated build, tests and deployment since this is the main goal of most CI setups, but where it gets more challenging is when the Sitecore Items get involved. Without the Sitecore Items in the CI setup there remains several manual parts for a release cycle.

image


Automating Sitecore builds
and release cycle

CruiseControl.NET has been chosen as build server platform and custom NAnt tasks are used in the build scripts for search and replace, robocopy and Sitecore Item control.


Item Versioning and (Auto)Serialization

Sitecore Items is a big part of a solution and the first requirement is that the Items can be put under Source control and versioned correctly, the native implementation from Sitecore is based on a manual "œdump" of what the developers choses to save to disk.

In a multi-developer environment this lead to developers dumping the whole sitecore database at each checkin, and reverting the full database takes over 10 minutes sometimes 30 so this was not done before each development session.

When renaming and deleting Items, this setup lead to Items being re-added to the tree after they had been deleted by another developer, because the other developers had not removed them before they themselves made a item dump and checked in.

What was needed was a synchronization model for keeping the file system up to date with Sitecore without user involvement, thereby the only files the developer checks in are the ones he has made changes to. This has been done by developing an auto serialization that attaches to the Item events and e.g. deletes the file if the Item is deleted, or serializes content items if there releted template is changed. We do not yet import file changes fully automated to Sitecore, for the fear of loosing work in case of merges and conflicts, but it would be a natural way to go.

This module means that we now have a stable model for versioning our sitecore item development, this was a base requirement for moving forward.  We have full traceability on the system development since every developer runs his own Sitecore code and database and both code and items are versioned.


Build Flow

We have done several iterations of the build scripts. Our latest iteration pushes the files before changing the configurations, and performs testing directly on the target system.

image


Repository Branching Strategy

Our latest project phmetropol.dk sometimes involved up to 8 developers, and 60+ change requests in some releases. For controlling this we created code branches in our repository for UAT and PROD. UAT had the latest code that was for final customer validation (UAT = User Acceptance Testing) and PROD contained the latest released code. This setup gave us the possibility to keep active development in the main trunk (incl. Sitecore Items) and releasing well tested code+Items in the UAT branch with a potential fix or two, and finally being able to hot fix (incl. Items).

Without version control on the Sitecore Items, we believe, such releases would have had major risks for errors.

that needed testing and We have also tried where the test was done locally before the files where moved, where items where separated from the build files but we had the need to introduce repository branching for adding a UAT and PROD build, and the configuration management when involving staged setups made the model complicated.


Configuration Management

The Sitecore solutions we have build in our environment have all involved staged setups, we have found two strategies for controlling the configuration under automated build.

Staged build and environment creation

genvej.nu is created with two websites in the Visual Studio project, one site for CMS and a site for the Front site, config files for both environments are checked in and most of the rest is copied from the Visual Studio build process from bin/ressources/layouts etc. to front. The only things the build script had to change was the environment elements in each web.config.


Staged and environment creation

phmetropol.dk was our next project we wanted to create the staged files based on the cms files only, for keeping the development environment more streamlined. This means that we, from the NAnt build file, first created a staged copy of the source, changed the config to match a staged setup (using include files for overriding where possible) and last customized based on the target environment.

This worked well in our development stage but when we saw the need to introduce the UAT environment and build this setup has become a bit complicated to maintain.


Sitecore Items

Controlling Sitecore Items in the build process required that we had them under version control and branched. Once this is in place the next step is to push them around on our different environments.

For reverting and packaging a Sitecore context is required, we have therefore implemented a web service in the Sitecore admin level, that gives us access to reverting, serializing and packaging features. Combined with a NAnt task we can control items deserialization or packing from the build script.

We have initially implemented a full revert or partial, that we can control through a web service on the Sitecore environment to give us Sitecore context. In a default cycle the only path we revert are template and layouts, but we can also revert all of Sitecore in both core and master, the problem is that this takes up to 30 minutes, so our default behavior is only the main elements.

After some iterations, we are currently looking at a model where we push the items to the target using robocopy and use the change log to revert only the affected items on Sitecore, we have done a proof of concept and this feature is in active development. This will mean we can revert sitecore items on each build because it will be done very fast. In the process we har also evaluating ideas for partial reverts on the developer machines but in that area we have yet to find the best model.

Once reverted and tested we can package e.g. template and layouts, and save a package that is then used for deployment to production, or backup.  When deploying we never take items related to Content or Media, every other Item is excepted to come from our controlled builds and packages. We have had some surprises with Web forms for marketers and Sitecore/system in this context but we will keep that for another post.


Testing

Basic code test is implemented with NUnit and could be run after the build is done on the build server. We have chosen to deploy the site first so we can run functional tests involving page clicks and search results for tests. For allowing tests on the Site we have used WatiN.

For making functional tests on controlled data and not client content we have introduced two parallel sites in development, one used in the building of NUnit tests that validate main functionality and the other used by the client to build their content. In the development phase we let the clients build up data on the qa environment and we actually fetched data with our tool web service that we pushed to our test server so we could see more real content in the test environment and still have a semi stable environment for client qa.

Other levels of testing and quality control have been implemented using FxCop, StyleCop and TotalValidator and NArrange in the development cycle.


Conclusions

We have used a reasonable amount of time building this setup. We are now able to construct larger Sitecore solutions, with tests, branching and a release cycle with full source control and minimal manual processes.

In our next project we hope to take the last step and implement continuous deployment, so production is updated straight from our build server. We also expect to implement Web Config Transformation now available with Visual Studio 2010.

We see a Continuous Integration environment as a natural part of a large Sitecore solution and an important move towards a release process.

We would like to know about your expirences on Continuous Integration, so please leave a comment or blog post.

Jan Hebnes, Head of .Net development at 1508 A/S

Originally posted to: http://www.15all.net/2010/11/12/sitecore-in-a-continuous-integration-setup/